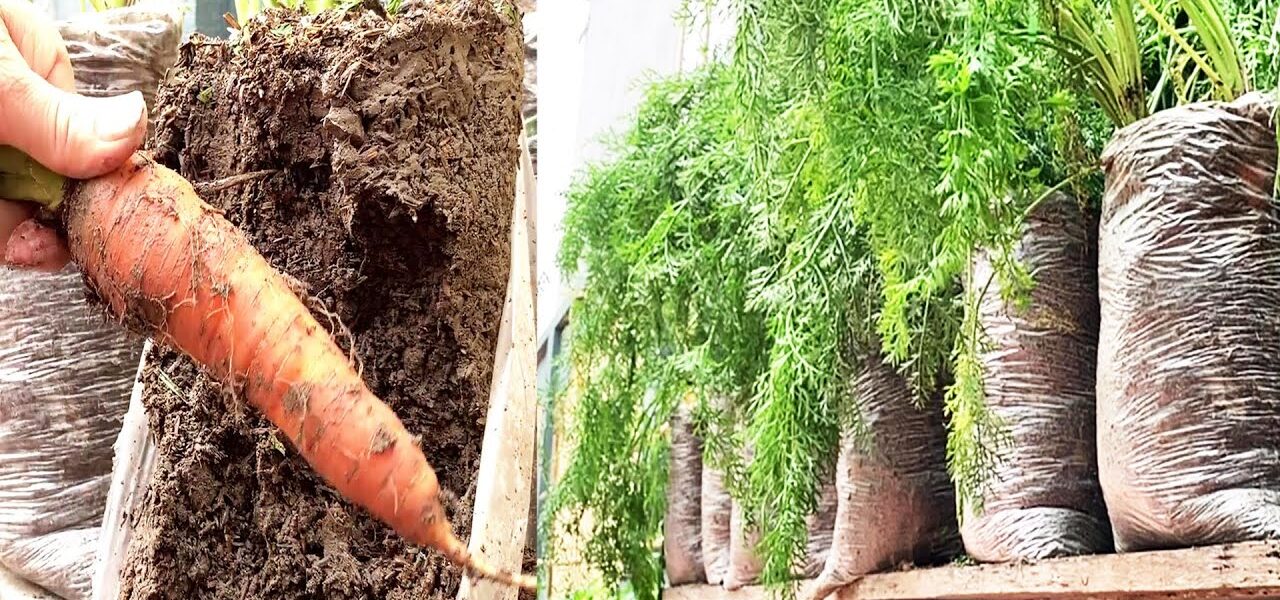
Carrots, with their sweet and vibrant roots, are a favorite addition to salads, stews, and a variety of dishes. While traditionally grown in garden beds, you can also cultivate these nutritious root vegetables in a more unconventional way – using plastic bags. This innovative method not only saves space but also allows you to enjoy fresh homegrown carrots, even if you have limited garden space or poor soil conditions. In this article, we’ll guide you through the process of growing carrots at home using plastic bags, turning even the smallest of spaces into a thriving carrot haven.
Why Plastic Bags?
Plastic bags offer a controlled environment for carrot growth, allowing you to regulate moisture levels and provide ideal conditions for germination and root development. They also prevent soil-borne pests from reaching your precious carrots, making it a practical and efficient way to enjoy a harvest of this popular root vegetable.
Getting Started:
- Gather Your Supplies:
- Plastic bags (reusable or grow bags)
- Potting mix or high-quality garden soil
- Carrot seeds
- Watering can or spray bottle
- Scissors or utility knife
- Choosing the Right Carrot Variety: Opt for shorter or baby carrot varieties, as they are well-suited for container gardening. Look for varieties with a faster maturation time for quicker results.
- Selecting the Bags: Choose reusable shopping bags or specialized grow bags with good drainage. Ensure they are clean and free from any residues.

Steps to Grow Carrots in Plastic Bags:
- Prepare the Bags: Cut several small drainage holes in the bottom of each bag to ensure proper water drainage. If using reusable bags, fold down the tops to create a stable structure.
- Filling with Soil: Fill the bags with a well-draining potting mix or garden soil. Leave some space at the top to avoid soil spillage when watering.
- Sowing Seeds: Scatter carrot seeds evenly over the soil surface. Carrot seeds are tiny, so spacing them out will prevent overcrowding as they grow.
- Covering Seeds: Lightly sprinkle a thin layer of soil over the seeds to cover them. Gently pat the soil to ensure good seed-to-soil contact.
- Moistening the Soil: Use a watering can or spray bottle to moisten the soil thoroughly. Ensure that the soil is evenly damp but not waterlogged.
- Monitoring and Care: Place the bags in a sunny spot or under grow lights. Keep the soil consistently moist by misting with water as needed. Carrot seeds usually germinate within 1-3 weeks.
- Thinning Seedlings: Once the carrot seedlings have grown a couple of inches tall, thin them out by snipping the weaker seedlings. Aim for spacing of about 2-3 inches between each plant.
- Feeding: After the carrot tops have grown a few inches, apply a balanced liquid fertilizer according to the product’s instructions.
- Harvesting: Carrots are ready for harvest when they reach the desired size and color. Gently pull them out of the soil, taking care not to damage the neighboring plants.
Tips for Success:
- Consistent Moisture: Carrots require consistent moisture throughout their growth cycle. Monitor the soil moisture to prevent it from drying out.
- Container Size: Choose bags that are at least 12 inches deep to accommodate the carrot roots’ growth.
- Thinning: Proper spacing is essential for carrot development. Thin the seedlings to avoid overcrowding and promote healthy root growth.
- Soil Quality: Use a high-quality potting mix or garden soil with good drainage to ensure successful carrot growth.
- Sunlight: Carrots thrive in full sun but can tolerate partial shade.

By using plastic bags as your growing medium, you can harness your creativity and turn any available space into a thriving carrot garden. This method is not only practical but also adds a touch of innovation to your gardening endeavors. With patience, care, and the right conditions, you’ll soon be enjoying the satisfaction of harvesting homegrown carrots straight from your plastic bag garden.