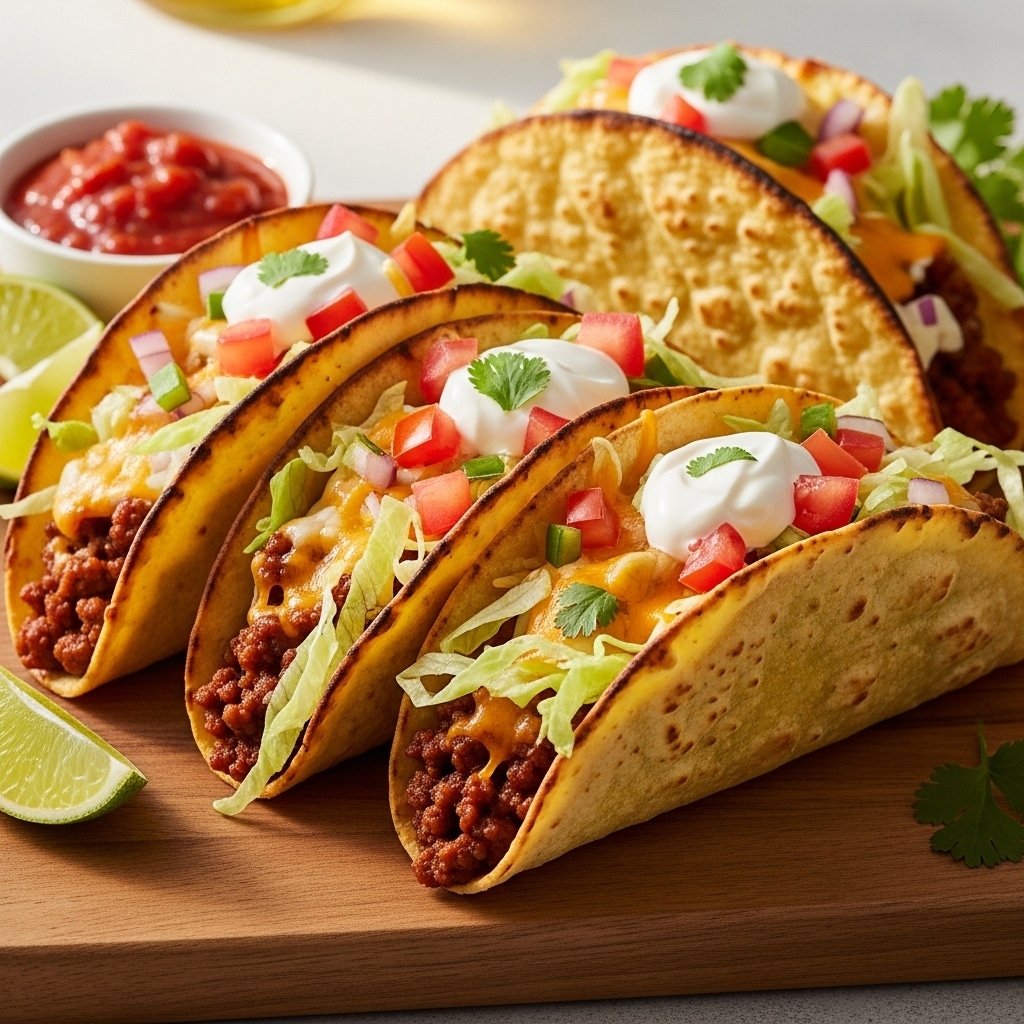
There are some days when dinner feels like a monumental task, especially after a long day of work, juggling kids’ activities, or just staring blankly into the fridge. I vividly remember one particularly chaotic Tuesday evening, and that’s when the idea for these Oven-Baked Cheesy Tacos popped into my head. I wanted all the joy of a freshly made taco without the mess of frying or the constant assembly line at the counter. The first time I pulled these golden, crispy, cheese-laden beauties from the oven, the silence that fell over the dinner table was all the confirmation I needed.
Why This Recipe is a Must-Try
- No Mess, No Frying: Get crispy taco shells without any oil splatter or standing over a hot pan.
- Feeds a Crowd Easily: Bake a whole batch at once instead of frying shells one at a time.
- Soggy-Proof: A layer of cheese on the bottom of each shell before the filling goes in keeps everything crisp.
- Ready in 30 Minutes: Simple enough for a genuine weeknight, not just a weekend project.
Key Ingredient Notes
Ground beef (80/20 or 90/10) gives the richest flavor, though ground turkey works well for a leaner option. A shredded cheddar or Mexican blend melts smoothly and holds the shell together as it bakes. Simmering the seasoned meat until the liquid mostly evaporates is key — too much moisture left in the filling is what makes shells go soggy.
Step-by-Step Guide with Pro Tips
- Brown the ground meat, draining excess fat, then stir in taco seasoning and water and simmer until the liquid mostly evaporates.
- Arrange taco shells open-side up in a 9×13 baking dish.
- Spoon a layer of cheese into the bottom of each shell first — this is what keeps them crisp.
- Fill with the seasoned meat, then top with more cheese.
- Bake at 375°F (190°C) for 10–15 minutes until the shells are golden and the cheese is bubbly.
Pro tip: don’t skip the cheese layer under the meat — it’s the single biggest difference between a crisp shell and a soggy one.
Variations & Serving Suggestions
Swap the ground meat for seasoned black beans, pinto beans, or sautéed peppers and onions for a vegetarian version. Top with shredded lettuce, diced tomatoes, sour cream, salsa, guacamole, and fresh cilantro. Leftover filling keeps well for 3–4 days, ready to reheat and reassemble with fresh shells.
Nutrition Information
| Nutrient | Amount Per Serving |
|---|---|
| Calories | 380 kcal |
| Carbohydrates | 25g |
| Fat | 22g |
| Protein | 22g |
| Serving Size | 2 tacos |
Conclusion
These Oven-Baked Cheesy Tacos are proof that a genuinely satisfying, crowd-pleasing dinner doesn’t need to be complicated. Golden shells, gooey cheese, and a table full of toppings — this has earned its spot as our go-to weeknight hero.
FAQs
Why are these oven-baked tacos better than traditional pan-fried ones?
Oven-baked tacos offer several advantages: they get perfectly crispy without the mess of deep-frying, they cook multiple tacos at once making it ideal for feeding a crowd, and the cheese melts into a gooey, irresistible layer that also helps prevent soggy bottoms.
Can I make these Oven-Baked Cheesy Tacos vegetarian?
Absolutely! You can easily swap the ground meat for seasoned black beans, pinto beans, lentils, or a mixture of sautéed vegetables like bell peppers, onions, and corn. Just follow the same steps for seasoning and baking, ensuring your vegetarian filling is flavorful and moist.
What are the best toppings for Oven-Baked Cheesy Tacos?
The possibilities are endless! Classic toppings include shredded lettuce, diced tomatoes, sour cream, salsa, and guacamole. For extra flair, consider fresh cilantro, pickled red onions, sliced jalapeños, a squeeze of lime juice, crumbled cotija cheese, or even a drizzle of hot sauce or chipotle mayo.
Can I prepare the taco filling ahead of time?
Yes, you can! The seasoned ground meat filling can be cooked and stored in an airtight container in the refrigerator for up to 3-4 days. When you’re ready to eat, simply reheat the filling, assemble the tacos in the shells with cheese, and bake as directed.
Oven-Baked Cheesy Tacos (Crispy & Loaded) You’ll Love!
These oven-baked cheesy tacos offer a convenient, mess-free way to enjoy crispy, loaded tacos, perfect for a quick weeknight meal.
- Total Time: 30 minutes
- Yield: 8-12 tacos (4-6 servings)
Ingredients
1 lb ground beef (80/20 or 90/10) or ground turkey
1 packet (or 2 tbsp homemade) taco seasoning
1/2 cup water or beef/chicken broth
10–12 hard taco shells
2 cups shredded cheddar or Mexican blend cheese
Instructions
Step 1: Begin by browning your ground meat (beef or turkey) in a large skillet over medium-high heat. Break it up with a spoon as it cooks. Once no pink remains, drain any excess fat. If using leaner meat, you might not need to drain much.
Step 2: Reduce the heat to medium. Add your taco seasoning and about 1/2 cup of water (or beef/chicken broth for extra flavor) to the meat. Stir well, bringing it to a simmer. Let it cook for 5-7 minutes, stirring occasionally, until the liquid has mostly evaporated and the meat is beautifully coated and fragrant.
Step 3: Preheat your oven to 375°F (190°C). Arrange your hard taco shells open-side up in a 9×13 inch baking dish. You might need to gently lean them against each other or use a taco rack if you have one to keep them upright. Don’t overcrowd the dish, as you want even heat circulation for crispy shells.
Step 4: Spoon a layer of shredded cheese into the bottom of each taco shell. This is a crucial step for preventing soggy bottoms and creating a delicious cheese barrier.
Step 5: Evenly distribute your seasoned ground meat filling into each cheese-lined taco shell. Don’t overfill them at this stage, as you’ll be adding more cheese and toppings.
Step 6: Top the meat filling with another generous layer of shredded cheese. This will melt beautifully, creating that signature gooey, crispy cheese crust.
Step 7: Carefully transfer the baking dish to your preheated oven. Bake for 10-15 minutes, or until the taco shells are golden and crispy, and the cheese is thoroughly melted and bubbly. Keep an eye on them to prevent burning.
Step 8: Once baked to perfection, remove the tacos from the oven. Let them cool for a minute or two before handling, as the cheese will be very hot.
Step 9: Garnish your hot tacos with your favorite fresh toppings (shredded lettuce, diced tomatoes, sour cream, salsa, guacamole, fresh cilantro, or pickled jalapeños). Serve immediately and enjoy the crispy, cheesy goodness!
Notes
Leftover filling can be stored in an airtight container in the refrigerator for up to 3-4 days. Reheat the filling and assemble with fresh shells and toppings when ready to serve.
- Prep Time: 15 minutes
- Cook Time: 15 minutes
- Category: Main Course
- Method: Baking
- Cuisine: Tex-Mex
- Diet: Omnivore
Nutrition
- Serving Size: 2 tacos
- Calories: 380 kcal
- Sugar: 3 g
- Sodium: 680 mg
- Fat: 22 g
- Saturated Fat: 10 g
- Unsaturated Fat: 10 g
- Trans Fat: 0.5 g
- Carbohydrates: 25 g
- Fiber: 3 g
- Protein: 22 g
- Cholesterol: 70 mg
Leave a Reply